Using Core Data in a Static Library !

In this post, we will learn how to use Core Data in a static library. After I learnt about the concepts of core data, I decided to create a library to manage my credentials using core data. It may not be straightforward but its not rocket science either 😀

Before we begin with this post, here are the perquisites

  • Should have Xcode 5 running on your Mac
  • Fair knowledge on Xcode/iOS development
  • Should have basic knowledge on core data. Refer this link to get hands on core data !

Here is what we are going to achieve. We will create a static library and understand how we can use core data to store user credentials. Later, we will plug this library in our CredentialManager application created in this post.

Lets get started by creating a static library as shown below

CredentialManagerLib_01

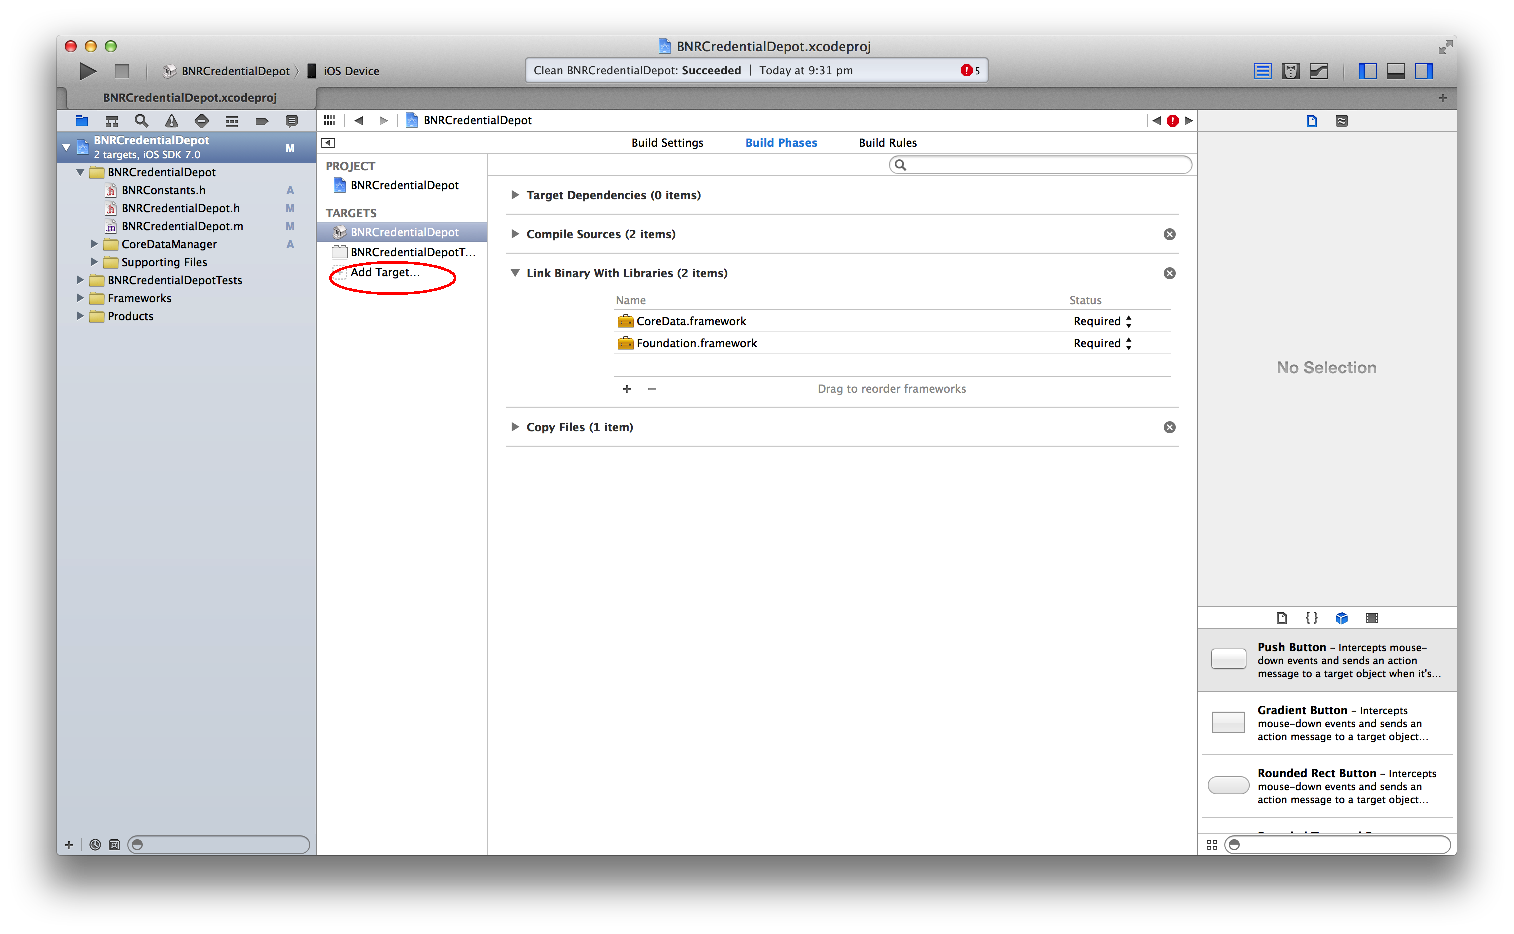
Lets name the Library as “BNRCredentialDepot”.

Since core data uses managed object model (momd) and sqlite to persist the data, moms should be bundled in the library. In order to achieve this, we have to create a bundle and include momd in the bundle.

Add a new DataModel file and create entities and attributes as explained in this post.

CredentialManager_09CredentialManager_10

We need to embed this data model in a bundle file so that we can package this along with the library.

Add a new target and create a bundle “CredentialDepot”, change the base SDK to Latest iOS SDK as shown below

CredentialManagerLib_02 CredentialManagerLib_03 CredentialManagerLib_04 CredentialManagerLib_05

Now drag and drop Credentials.xcdatamodeld to CredentialDepot -> Build Phases ->Compile Sources as shown below

CredentialManagerLib_06 CredentialManagerLib_07

Expand the Other Frameworks folder in the left pane and delete the duplicate frameworks – Foundation.framework, AppKit.framework. Add CoreData.framework in the build phase

CredentialManagerLib_08

Now, add a new file of type NSObject class and create managed object context, managed object model & persistent store coordinator as shown below (you can copy the same from Appdelegate of CredentialManager app)

CredentialManagerLib_09

Remember, we have embed the Credentials.xcdatamodeld in the CredentialDepot bundle. Hence the path to access this in managed object model should be relative to this bundle


NSString *bundlePath = [[NSBundle mainBundle] pathForResource:@"CredentialDepot"  ofType:@"bundle"];

NSBundle *bundle = [NSBundle bundleWithPath:bundlePath];

NSString *modelPath = [bundle pathForResource:@"Credentials" ofType:@"momd"];

NSURL *modelURL = [NSURL fileURLWithPath:modelPath];

Once this is set, we will write 2 methods, one to fetch the user credentials & the other to store the credentials as shown below


-(NSMutableDictionary *)getUserCredentialsFromDB

{

NSMutableDictionary *userCredentialDict = nil;

NSManagedObjectContext *context = [self managedObjectContext];

NSError *error;

<span style="line-height: 1.5em;">    // Fetch all the available username/password stored in the database</span>

NSFetchRequest *fetchRequest = [[NSFetchRequest alloc] init];

NSEntityDescription *entity = [NSEntityDescription entityForName:@"UserCredentials"

inManagedObjectContext:context];

[fetchRequest setEntity:entity];

NSArray *fetchedObjects = [context executeFetchRequest:fetchRequest error:&error];

if ([fetchedObjects count]) {

<span style="line-height: 1.5em;">        UserCredentials *userCredentials = [fetchedObjects objectAtIndex:0];</span>

userCredentialDict = [[NSMutableDictionary alloc] initWithObjectsAndKeys:

userCredentials.username,USERNAME,

userCredentials.password,PASSWORD, nil];

<span style="line-height: 1.5em;">        NSLog(LIBRARY_LOGS_BEGIN);</span>

NSLog(@"Retried From Database : Username - %@ , Password - %@",userCredentials.username,userCredentials.password);

NSLog(LIBRARY_LOGS_END);

}

return userCredentialDict;

}


-(BOOL)storeUserCredentialsFromDB:(NSMutableDictionary *)userCredentialsDict

{

BOOL isSuccess = NO;

NSManagedObjectContext *context = [self managedObjectContext];

NSError *error;

// Fetch all the available username/password stored in the database

NSFetchRequest *fetchRequest = [[NSFetchRequest alloc] init];

NSEntityDescription *entity = [NSEntityDescription entityForName:@"UserCredentials"

inManagedObjectContext:context];

[fetchRequest setEntity:entity];

NSArray *fetchedObjects = [context executeFetchRequest:fetchRequest error:&error];

if ([fetchedObjects count]) {

UserCredentials *userCredentials = [fetchedObjects objectAtIndex:0];

@try

{

//Store Username & Password in the DB

userCredentials.username = [userCredentialsDict objectForKey:USERNAME];

userCredentials.password = [userCredentialsDict objectForKey:PASSWORD];

NSLog(LIBRARY_LOGS_BEGIN);

if (![context save:&error]) {

NSLog(@"Error in saving User Credentials: %@", [error localizedDescription]);

}else{

//If the credentials are already preset, update the record

isSuccess =YES;

NSLog(@"Update User Credentials in DB : Username - %@ ,  Password - %@",userCredentials.username,userCredentials.password);

}

NSLog(LIBRARY_LOGS_END);

}@catch (NSException *exception) {

//Log exception

NSLog(LIBRARY_LOGS_BEGIN);

NSLog(@"Exception - %@",exception.description);

NSLog(LIBRARY_LOGS_END);

}

}else{

UserCredentials *userCredentials = [NSEntityDescription insertNewObjectForEntityForName:@"UserCredentials" inManagedObjectContext:context];

@try

{

//Store Username & Password in the DB

userCredentials.username = [userCredentialsDict objectForKey:USERNAME];

userCredentials.password = [userCredentialsDict objectForKey:PASSWORD];

NSLog(LIBRARY_LOGS_BEGIN);

if (![context save:&error]) {

NSLog(@"Error in saving User Credentials: %@", [error localizedDescription]);

}else{

//If the credentials are not preset, insert the record

isSuccess =YES;

NSLog(@"Insert User Credentials in DB : Username - %@ ,  Password - %@",userCredentials.username,userCredentials.password);

}

NSLog(LIBRARY_LOGS_END);

}@catch (NSException *exception) {

//Log exception

NSLog(LIBRARY_LOGS_BEGIN);

NSLog(@"Exception - %@",exception.description);

NSLog(LIBRARY_LOGS_END);

}

}

&nbsp;

return isSuccess;

}

With our logic to fetch and store the user credentials is written, we have to link the target of the bundle with the application.

Go to Product -> Scheme -> Edit Scheme

Select Build & then select CredentialsDepot , click Add as shown below

CredentialManagerLib_11 CredentialManagerLib_12 CredentialManagerLib_13

Add this code in BNRCredentialDepot class


+(NSMutableDictionary *)getUserCredentials

{

BNRCredentialManager *credentialManager = [[BNRCredentialManager alloc] init];

return [credentialManager getUserCredentialsFromDB];

}


+(BOOL)storeUserCredentials:(NSMutableDictionary *)userCredentialsDict

{

BNRCredentialManager *credentialManager = [[BNRCredentialManager alloc] init];

return [credentialManager storeUserCredentialsFromDB:userCredentialsDict];

}

Now, its time to build the library ! Use CMD+B to build the library. It should build without any errors.

CredentialManagerLib_14

Make sure both .a and .bundle files are generated with any errors !

Now, open our CredentialManager application and add libBNRCredentialDepot.a , CredentialsDepot.bundle & BNRCredentialDepot.h in CredentialManager.

All you need to do is call these methods on click of Register & Login buttons respectively !

</pre>
-(BOOL)isRegistrationSuccess

{

NSMutableDictionary *userDict = [[NSMutableDictionary alloc] initWithObjectsAndKeys:self.usernameTextFieldForRegistration.text,USERNAME,self.passwordTextFieldForRegistration.text,PASSWORD, nil];

BOOL isSuccess=  [BNRCredentialDepot storeUserCredentials:userDict];

return isSuccess;

}
<pre>-(BOOL)isLoginSuccess

{

BOOL isSuccess = NO;

NSMutableDictionary *userDict = [BNRCredentialDepot getUserCredentials];

if ([[userDict objectForKey:USERNAME] isEqualToString:self.usernameTextFieldForLogin.text] && [[userDict objectForKey:PASSWORD] isEqualToString:self.passwordTextFieldForLogin.text]) {

isSuccess = YES;

return isSuccess;

}

return isSuccess;

}

Congratulations ! You have successfully created a library which manages your credentials and you can plug into any application ! 🙂

The source code of the Library can be downloaded from this link

The source code of the CredentialManager which uses the library can be downloaded from this link

Persisting Data Using Core Data

Core Data is basically a model layer technology which helps to build the model layer that represents the state of the app. Core Data can also be used as a persistent technology which helps to persist the state of the model object to the file storage. In this post, we will learn how to use Core Data to persist data, say, username and password given by the user in a persistent storage/database. Here are the prerequisites

  • Should have Xcode 5 running on your Mac
  • Fair knowledge on Xcode/iOS development
  • Should have created any applications using basic UI elements like UILabel, UIButton,etc

Lets get started by creating a Single View Application as shown below

CredentialManager_01


Open Main.storyboard and embed the view controller in a navigation controller. Now, drag and drop two UIViews in the storyboard and name it as RegistrationView and LoginView. The first time when the application is launched, we will show the RegistrationView. Once the user enters the credentials and logs in, for subsequent launches, we will show the LoginView. In the RegistrationView, create IBOutlets for the textfields and methods for the buttons as show below

CredentialManager_02

Similarly, In the LoginView, create IBOutlets for the textfields and methods for the buttons as shown below

CredentialManager_03


Before we get started with Core Data, lets write some logic to show registration screen on the first launch of the application.We store a flag in NSUserDefaults to indicate whether its a first time launch or not.

NSUserDefaults *userDefaults = [NSUserDefaults standardUserDefaults];
NSString *launchFlag = [userDefaults objectForKey:@"LaunchFlag"];
self.isFirstTimeLaunch = (launchFlag.length) >0 ? YES:NO;

Handle basic operations like showing alert if username & password fields are blank and update the methods which gets called on Register/Login. Now, lets start writing code to persist user credentials using Core Data. Core Data has 3 main components – Managed Object Model – Its a database schema, contains definitions for each of the Entities that you are storing in the database Persistent Store Coordinator – Its a database connection which has the information about name and location of the database Managed Object Context – Its a single instance (in most of the case) which holds all the managed objects

CredentialManager_04


A simple way to generate code for Core Data is to create a Master-Detail Application and marking the checkbox when prompted for “Use Core Data”. I don’t know why Apple has provided this option only in Master-Detail Application.

CredentialManager_05 CredentialManager_06 CredentialManager_07


Now, use this code in our application to create a data base schema to store the login credentials of the user. Copy the core data code in the Master-Detail Application AppDelegate and paste it in our application CredentialManager AppDelegate. If you try to compile our application, it will throw an error pointing NSPersistentStoreCoordinator & NSManagedObjectModel. Inorder to resolve this error, add CoreData framework in the Build Phases as shown below.

CredentialManager_08


Import core Data in AppDelegate #import <CoreData/CoreData.h> This should resolve all our errors !! Right click on the project navigation panel, select Core Data, select DataModel, name the model as “Credentials” and click on create as shown below

CredentialManager_09


Once Credentials.xcdatamodeld is created, click on that make following changes

1. Click on Add Entity and name the entity as “UserCredentials”

2. Click on + symbol in the attributes and add attributes username & password, select the type as string. This will be our database schema. Note : You can add more entities and create relationships between entities by using Editor Style (3)

CredentialManager_10


Now, go back to AppDelegate and change the name of momd to Credentials and sqlite to CredentialManager.sqlite as shown below

CredentialManager_11

The beauty of Core Data is that we need not have to take pain in creating model classes for the entities in our data base schema. Create a new file -> Core Data -> NSManagedObject subclass , select Credentials, select UserCredentials to create a new modal file. We will call a method when user taps on Register/Login button. This method will have the logic to save or update the credentials entered by the user. I know we should not save the credentials in clear text but lets not worry about the encryption part as this post is more about persisting the data ! 🙂

Paste this code in the method which gets called when user taps Register/Login button

BOOL isSuccess = NO;
AppDelegate *appDelegate = [[UIApplication sharedApplication] delegate];
NSManagedObjectContext *context = [appDelegate managedObjectContext];
NSError *error;
// Fetch all the available username/password stored in the database
NSFetchRequest *fetchRequest = [[NSFetchRequest alloc] init];
NSEntityDescription *entity = [NSEntityDescription entityForName:@"UserCredentials"
                                              inManagedObjectContext:context];
[fetchRequest setEntity:entity];
NSArray *fetchedObjects = [context executeFetchRequest:fetchRequest error:&error];
if ([fetchedObjects count]) {    
        UserCredentials *userCredentials = [fetchedObjects objectAtIndex:0];
        if ([[userCredentials.username lowercaseString] isEqualToString:[self.usernameTextField.text lowerca seString]]

        && [[userCredentials.password lowercaseString] isEqualToString:[self.passwordTextField.text lowercaseString]])
        {

            userCredentials.username = self.usernameTextField.text;

            userCredentials.password = self.passwordTextField.text;

            if (![context save:&error]) {

                NSLog(@"Error in saving Credentials: %@", [error localizedDescription]);

            }else{

                NSLog(@"Update Credentials in DB : Username - %@, Password - %@", userCredentials.username, userCredentials.password);

                isSuccess = YES;

            }

        }

        else{

            isSuccess = NO;

        }

    }else{

        UserCredentials *userCredentials = [NSEntityDescription insertNewObjectForEntityForName:@"UserCredentials" inManagedObjectContext:context];

        userCredentials.username = self.usernameTextField.text;

        userCredentials.password = self.passwordTextField.text;

        if (![context save:&error]) {

            NSLog(@"Error in saving Credentials: %@", [error localizedDescription]);

        }else{

            NSLog(@"Insert Credentials in DB : Username - %@, Password - %@", userCredentials.username, userCredentials.password);

            isSuccess = YES;

        }

    }

Here, we are going to rely on the managed object context from AppDelegate. We query the user credentials from the entity we created in our Credentials.xcdatamodel.  With the help of NSFetchRequest & NSEntityDescription, we query if any credentials are saved in the DB. If present, we compare with the values given by the user and display messages based on the result of comparison operation!

CredentialManager_13


Hope this post helped you to understand how Core Data can be used to persist data in your application. You can download the source code from this link.

Demystifying Autolayouts and UIScrollView ! – Part 1

UIScrollView, a class provided by Apple under UIkit framework , allows displaying content that is larger than application window. In most of the examples, UIScrollView is considered to be one of the complex UI class .

Before AutoLayouts, working with UIScrollView was pretty simple – calculate the height required to accommodate all the UI elements and set the content size of UIScrollView to resize as shown below

[scrollView setContentSize:CGSizeMake(width,height)];

With the introduction of Auto Layouts, developers find it quite difficult to understand the behaviour of UIScrollView.  At one point of time, even I got annoyed with the way UIScrollView behaves while working with storyboard on Xcode 5 but once i get to know the behaviour, all I did is praise Apple for giving such a powerful feature in Xcode !

Let us create a sample application and see the complexity of UIScrollView with Auto Layouts.

Here are the prerequisites

  • Should have Xcode 5 running on your Mac
  • Fair knowledge on Xcode/iOS development & AutoLayouts
  • Should have created any applications using basic UI elements like UIScrollView, UIButton,etc

Open the Xcode and create a “Single View Application” as shown in the image below.

AutoLayoutScroll_CreateProject

Now, lets add a Navigation Controller to the storyboard.

Select Main.storyboard , select Editor -> Embed In -> Navigation Controller

Now, drag and drop a UIScrollView object  from objects library on to the view .

From the object library, drag UIView object on to the storyboard, make it as a subview of UIScrollView and change the background colour to blue colour (While designing UI, I always use different background colour for UI elements which helps me differentiate between the elements. Later I change it to required bg or default colour ). Lets call this “countryView

Similarly , drag another UIView object from object library and place it below  countryView . Change the background colour to green colour . Lets call this “currencyView“.

Select the scroll view and pin all its edges to its superview as shown below.

 AutoLayoutScroll_PinScrollView

Now, select the countryView, add Top, Leading & Trailing  constraints . (For adding constraints on storyboard, go through this link). Also, add Similarly, select currencyView, add Leading, Trailing constraints. Now, add a vertical spacing between countryView & currencyView. Add height constraints for countryView and currencyView as shown below.

AutoLayoutScroll_AddingConstraints_1.1 AutoLayoutScroll_AddingConstraints_1.2 AutoLayoutScroll_AddingConstraints_1.3

Now we think we have added all the required constraints  for countryView and currencyView but looks like our Xcode is not happy ! Did you observe a red coloured arrow ? Click on that to reveal what Xcode is expecting from us.

It says “ScrollView- Has ambiguous scrollable content height” . This is one error/warning which will keep bugging when you are working with UIScrollView and Auto Layouts.


Note :
If our countryView and currencyView was embedded in a UIView instead of UIScrollView, we wouldn’t have seen this error/warning. Always keep this in mind – “Never ignore any warnings & errors on storyboard (or anywhere in the code) for it may cause much bigger problems which will become difficult to trace” .

When you are adding child view to UIScrollView, it always expects constraints which will make scrollview to adjusts its content size. Remember, with auto layouts, we must forget setContentSize instance method and let scroll view adjusts its contentSize based on the constraints.

Just to spice it up, lets add another UIView and call it countryFlagView. Add an UIImageView onto countryFlagView and add constraints as shown below

AutoLayoutScroll_constraints_1.4

Now lets add all the missing constraints to remove all those warnings/error seen on storyboard.

Add leading, Trailing, Bottom Space constraints to countryFlagView. Also add vertical spacing between currencyView and countryFlagView as show below.

AutoLayoutScroll_constraints_1.5 AutoLayoutScroll_constraints_1.6 AutoLayoutScroll_constraints_1.7 AutoLayoutScroll_constraints_1.8 AutoLayoutScroll_constraints_1.9

In spite of adding all these constraints, our Xcode still shows a warning. Select countryView, currencyView, countryFlagView (by holding Command key) , Go to Editor-> Align -> Horizontal Center in Container as shown below .

AutoLayoutScroll_constraints_1.10 AutoLayoutScroll_constraints_1.11AutoLayoutScroll_constraints_1.12

Voila, all our errors/warnings are gone 🙂

Note: If at all you come across any errors/warnings on storyboard, never ignore it. Try to find the root cause and fix before you proceed

Enough of auto layouts on storyboard. Lets create some of the UI objects programatically and apply auto layout constraints to them . Sounds interesting ? Yes, it is !! Check out “Demystifying Autolayouts and UIScrollView ! – Part 2”