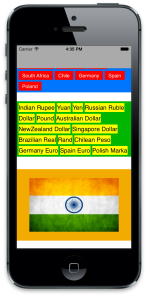
In Part 1 of “Demystifying Autolayouts and UIScrollView” , we get to know the behaviour of UIScrollView while working on storyboard. The objective of this post is to create UI elements like UIButtons,UILabels programatically and add constraints to it. In order to achieve this, I will create a simple app which displays country names (UIButtons) and its currencies (UILabels).
We reuse the same app that we created in part 1. Add instance variable for each view as shown below.
Create members to hold to list of country names & currencies.
With Auto Layouts, we must forget frame based coding for UI elements (that we used to do prior to auto layouts by setting view.frame = CGRectMake(x,y,width,heigh)). Every thing is controlled by constraints.
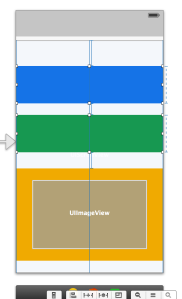
Lets add constraints to each view that we created on storyboard. Remember, we are creating UIButtons and UILabels programatically. The number of UIButtons & UILabels that we are going to create may not fit countryView and currencyView. In order to achieve this, we have to set height constraints and decrease the priority from its default value 1000 as shown below.
Did you notice when you change the priority, the blue thick line beside countryView becomes dotted line ?
Now, add height constraints by wiring countryView and currencyView onto the view controller (just the way you wire any IBOutlet) as shown below
After all the constraints are wired and model is initialised, lets us get into coding.
This method will create a simple UIButton with some of its properties set . Since we are dealing with auto layouts (and not Auto Resizing Masks), remember to set translatesAutoresizingMaskIntoConstraints to NO.
-(UIButton *)createCountryButton
{
UIButton *countryButton = [UIButton buttonWithType:UIButtonTypeCustom];
//Always make translatesAutoresizingMaskIntoConstraints to NO when you are working
// with auto layout constraints
countryButton.translatesAutoresizingMaskIntoConstraints = NO;
countryButton.contentEdgeInsets = UIEdgeInsetsMake(2,10,0,10);
countryButton.backgroundColor = [UIColor colorWithRed:255/255.0 green:0/255.0 blue:0/255.0 alpha:1.0];
countryButton.titleLabel.lineBreakMode = NSLineBreakByTruncatingTail;
if ([BNRConstants isDeviceiPhone]) {
countryButton.titleLabel.preferredMaxLayoutWidth = 250;
}else{
countryButton.titleLabel.preferredMaxLayoutWidth = 500;
}
countryButton.titleLabel.font = [UIFont fontWithName:@”Helvetica” size:14.0f];
[countryButton setTitleColor:[UIColor whiteColor] forState:UIControlStateNormal];
[countryButton setTitleColor:[UIColor yellowColor] forState:UIControlStateSelected];
[countryButton sizeToFit];
[countryButton addTarget:self action:@selector(showCountryName:) forControlEvents:UIControlEventTouchUpInside];
return countryButton;
}
Create as many buttons as you want to list the country names and add UIButton objects in a NSMutableArray as show below.
The interesting part starts now – Adding constraints programatically !!
There are different ways of adding constraints, one of which is “Visual Format Language“. I’ll be using VFL in this post as i find it comfortable and effective to use.
Now visualise this scenario – A button to be placed in countryView with some Xoffset from left and Yoffset from top.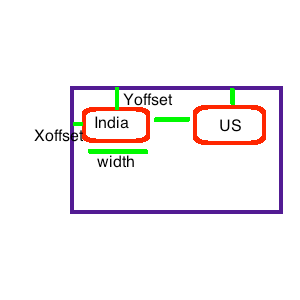
Here , the first button is placed relative to its superView, i.e., countryView and all the subsequent buttons are placed relative to its previous button. This is the logic that we are going to use to achieve our objective !
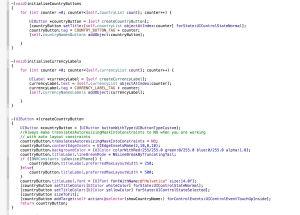
Note that we have to change the height constraint of countryView unlike setting the frame in non auto layout (auto resize masking) approach. I am attaching images of code snippet to add constraints to help you understand the constraints which you can add programatically !
(click to enlarge the image)
Similarly , create UILabels programatically and add constraints to adjusts itself to fit in currencyView.
Note that nowhere in the code we are setting the contentSize of UIScrollView . With the right constraints, auto layout will take care of setting the contentSize and reduces your work of handling scroll height . Lets all bow to “Auto Layouts” 🙂
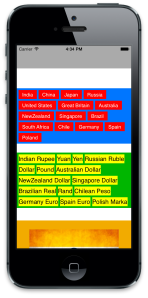
This is how our app looks on different orientations.
We were able to achieve our objective by creating UI elements programatically, place it under UIScrollView and add constraints to it . Happy coding !! 🙂
You can download the source code from this link






This doesn’t work with xib though
it’s very amazing , but i could’n find your code in git , so ,can you post it to my email ?
auu.aug@gmail.com . thank you very much .
You can find the source code @ https://github.com/bharathios/AutoLayoutScroll